It’s called Rail Dust… and it was all over our car, literally on every side.
What is Rail Dust? It’s basically steel or iron dust that lands on your car paint and begins to rust. It can embed itself pretty well into the paint surface. To remove it, you’ll have to do more than just a carwash.
Sources of Rail Dust
Rails from when cars are transported by rail.
Dust from brakes
Grinding metal in the garage, where you keep your car… won’t do that any more!
How to remove the rust.
Step 1: Wash your car… use soap and some wash mitts. Remember to rinse the mitt of any dirt or sand before dunking back into the soap bucket. I know… I used to wash cars for a living. Okay… it wasn’t really a living.
Step 2: Get some Iron X by CarPro. Follow instructions on the bottle. You will basically shake it, spray it, wait 5 minutes, rub in with a sponge, and rinse well. This stuff works like magic!
Step 3: If some spots remain, repeat step 2
Step 4: Wash Car again.
Step 5: Use a Clay Bar Kit by Mothers to remove anything remaining. Follow instructions provided. You will basically spray on the lubricant, rub clay bar over surface, wipe dry, knead and fold the bar, and repeat. Do about 2-3 square feet at a time.
Talking from personal experience…
We own a 2014 Toyota Highlander in Blizzard Pearl White, rail dust’s favorite color! I nearly flipped when I first noticed rail dust all over the car. At that time, I didn’t know what it was. I thought it might be some kind of factory paint defect, and couldn’t believe I didn’t see it when we bought the car.
I was ready to get out the warranty, call up the dealership, but after a bit of research online, i found out what it really was… rail dust. Luckily, it’s relatively easy to remove. You just need the right cleaner. The one I found was IronX. Reviews looked good, so I got it. To be honest, I didn’t expect it to work as well as it did.
The moment you spray on IronX, a chemical reaction takes place which essentially “dissolves the sintered iron by forming a water soluble iron complex” – carpro-us.com
This cleaner started working immediately, turning the rust purple and slowly washing it out. It may be tempting to stop at that, but you should also rub the car with a damp sponge. The larger particles are not likely to dissolve completely just from the cleaner. Since I had enough of the cleaner, I sprayed it twice.
After a couple hours of work, the car was clean and I was pretty happy with the outcome.
The End Result
Note: Some of the links provided on this blog may be affiliated links, which help pay for this blog. At no additional cost to the buyer, If a purchase is made via an affiliated link, I earn a commission.
With the frequent movement of the heat bed, it’s important to keep the cables on the Ender 3 where they need to be. Constant rubbing or snagging of the cable will inevitably lead to damage and failure. A well designed cable carrier will prevent this from happening.
The one that I found and recommend is: by johnniewhiskey
Filament Guide
The filament guide is probably the most important upgrade to the Ender 3. Without a guide, the filament will wear into the feeder assembly inlet. It doesn’t take long for this to happen. I must have printed no more than ten times before i noticed serious wear.
There’s no need to fear, this problem can be easily solved with your 3D printer . The filament guide that I like just happens to be one I designed myself… To download the model for yourself, head over to thingiverse.
In order to make use of this filamant guide, you will need a ball bearing. The size needed is fairly common : 3/8 x 7/8 x 9/32. If you don’t have a bearing this size, you can find one on amazon: R6-2RS Sealed Bearings
SD Card Adapter
If you are a frequently use the SD card slot on your 3D printer, it’s probably a good idea to look into a SD Card Adapter (aka SD Ribbon Cable or SD Extension Cable). Using an SD card adapter will prolong the life of the SD slot on your 3D printer. Rather than wearing out the SD slot on the printer, you will wear out the adapter, a cheap and easy replacement.
Of course, just plugging in the SD card adapter and letting it hang out of the slot doesn’t look very professional. You need to clean it up a bit. For that, I recommend a holder. There are lots of designs on the internet, but the one I like is by: Review3d
Fan Guard
The cooling fan to the power supply is located directly under the heat bed which is not the best location for it. A better location for the fan would have been below, or the front of the printer. The poor placement of the fan causes it to draw in warm air. Not to mention, filament debris can easily fall into the power supply, causing harm/damage.
Once again, the 3D printer has the problem… and the solution. There are a lot of free designs to choose from that can protect the power supply from debris, and draw in cooler air. The design I like, is by: gunzo182 . Although I should mention, with this print I found that the hold spacing was short. I had to get my drill out and stretch it out a bit. Not ideal, but easily corrected.
VIDEO
Note:Some of the links provided on this blog may be affiliated links, which help pay for this blog. At no additional cost to the buyer, If a purchase is made via an affiliated link, I earn a commission.
The masterspool is a concept by 3D Solutech, a company that sells PLA and other types of filament for the 3D printer. The concept is simple… print a reusable spool and save some money on filament. The average cost of PLA on amazon is somewhere around $19. You can buy filament for the masterspool for only $15 (a few bucks cheaper). It comes wound on a cardboard tube and is held together with cable ties.
Ecofriendly
The masterspool is environmentally friendly because it can be reused over and over again. This is great news, because your typical spool isn’t even recyclable. It goes to the trash, unless you can find another purpose for it.
It’s not perfect. A few negatives…
In a more perfect world, everyone would be using reusable spools, and filament would be sold for that type of platform by default, but unfortunately, that is not the case… at least not yet. I’m not entirely sure why, because it seems like a really good idea, and in more ways than one.
The problem I think is due to these two issues (mainly the first one):
There are limited color & material options for the masterspool.
Transferring filament to the masterspool can be a bit tricky.
The first item mentioned, in my opinion, is the BIG issue. Several weeks ago you could buy filament for the masterspool in over six different colors. This week I see only three. I hope this is not some kind of trend and will reach out to 3D Solutech regarding this question.
The second item is not really an issue… if you are careful. When you transfer the filament to the masterspool and remove the cable ties, the filament will relax outward. It’s intentionally wound tighter in order to fit the spool. Because of this, there is potentially for the filament to wedge.
Despite these negatives, I still think a reusable spool is a good idea and that more people should be aware of the option. I’m just hoping that the lack of supply right now is only due to the high demand; that 3D Solutech just needs to restock their shelves.
Note:Some of the links provided on this blog may be affiliated links, which help pay for this blog. At no additional cost to the buyer, If a purchase is made via an affiliated link, I earn a commission.
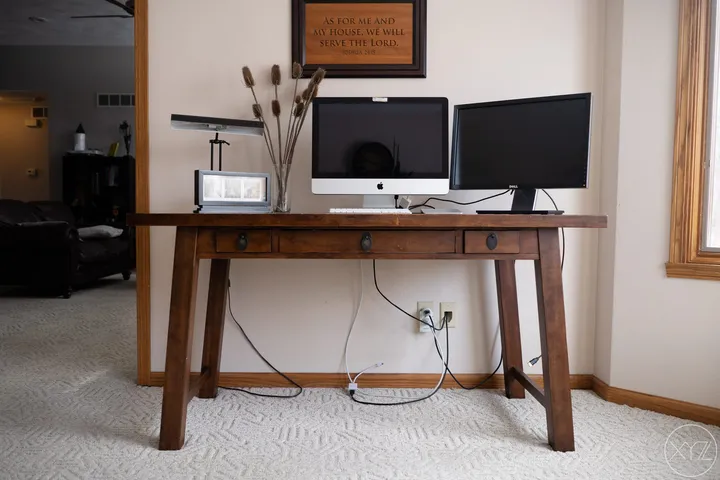
Nothing makes a nice desk look bad like a bunch of cables all over the place. For the longest time I had been ignoring this problem. But not anymore. With the help of my Creality Ender 3 (3D Printer) I took a swing at it.
3D Printer
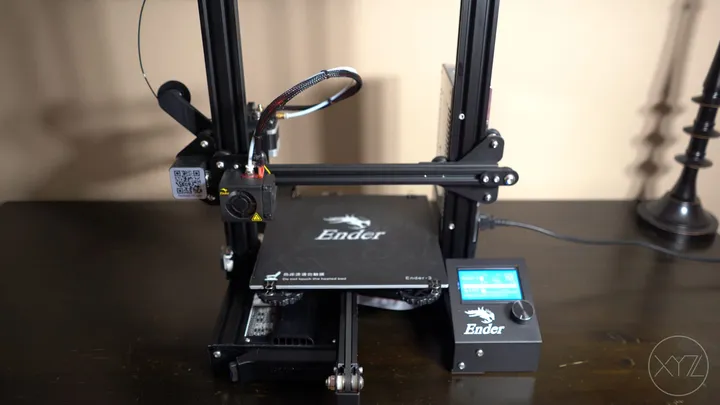
This is the Creality Ender 3. One of the most affordable 3D printers. Print quality is amazing.
The Design, and what to call it… Cable Routing Jaws maybe?
I’m not sure what to call these two things, but I designed them with the help of 3D modeling software. The hexagonal shape I thought gave them a modern/industrial look.
In order to keep the cables behind the desk, I decided on a two piece design. The two pieces were mounted with flat head #6 x 5/8″ wood screws that I found in the garage. I made sure to pre-drill so as not to crack the wood.
Voilà, Its done!
I have to say, I’m pretty happy with how things came out. The office looks more neat and organized… if only my desk at work was this clean.
If you would like to print your own cable management system, you can find the 3D model here at thingiverse.
Note:Some of the links provided on this blog may be affiliated links, which help pay for this blog. At no additional cost to the buyer, If a purchase is made via an affiliated link, I earn a commission.
In 2018 I finally decided to upgrade my camera to the Sony A7 iii. My Nikon D300 was getting old (over 10 yrs old) and I wanted to get a camera that could shoot videos. Video was always an interest of mine, but I had never been able to fully pursue it due to the expense of owning two cameras. Sure, you always have your phone, but it’s not the same. Just agree with me, it’s not the same. So with the purchase of the Sony, I was finally able to have two great cameras in one; both a great still camera and one that did not compromise in the area of video quality/functionality. Unfortunately what this meant was I would also need to upgrade my computer… that is If i wanted to do anything with the videos that this camera was capable of making.
Mac vs PC
As far as far as computer choices go, in my mind there were two options… Mac or PC. I liked Apple products and had been using their phones and computers for years, but after a heavy camera purchase, I was more inclined to take the cheaper route with a computer. A Mac with all the options I was looking for was going to cost about $2600. Wanting to save some $$$, I decided to build a PC… a great option for anyone wanting to get more performance for less money. Another great benefit to building is that you also have the ability to customize for your needs, that is, spend more on the components that count, and a bit less on those that don’t.
Strategic Selection
After a little bit of research, I found that the three largest contributors to speed and performance in a video editing PC are: processor, ram, and hard drive. For that reason I went with AMD Ryzen’s 8-Core 3.7Ghz 2700X, TridentZ’s 32GB DDR4 3200, and Samsung’s 500GB EVO 970 SSD (Solid State). I liked that the Ryzen had 8-cores , came with a nice CPU cooler, and was cheaper than it’s Intel rival. For RAM, I went with 32gb because video editing programs eat up a lot of RAM, especially with 4K & larger file sizes. For the Hard Drive, Solid State was the only choice, because of how fast they are. I wanted startup times to be in seconds, not minutes. The rest of what went into this computer, like the motherboard & video card, I could have gone with pricier options, but I realized it wasn’t necessary; I would have no significant boosts in speed. Here is the complete list of parts that went into this build are:
If you’re on a tight budget, I found a great way that you can save. It’s called Black Friday Deals (no explanation needed, really). Being patient and waiting for the holidays can save you a substantial amount of money. With this build, I was able to save $316. I didn’t need to camp out at the store front. There is no need for that; bought everything online. My strategy was simple… one week before Black Friday, I started checking prices every morning (and at lunch break) at each of the popular online vendors (Amazon, Newegg, B&H Photo, and Google – under the shopping category). Most everything was bought on sale, except for a few items who’s prices didn’t drop at all, the InWin A1 case, being one of them.
Build it yourself… a few helpful tips.
I’m not a gamer or a computer wiz, but I do enjoy building things. This is only the 2nd computer I’ve ever put together. The last one was over 12 years ago. A lot has changed since then, so I had to do a little bit of research before starting. If you wish to take on such a challenge, you may need to do the same; technology changes so fast! Anyhow, I don’t consider myself any kind of expert, but I did learn some things along the way. Here are a few tips I put together, that could be helpful to you.
Pick your form factor – There are several size cases to choose from and the motherboard you choose will need to match, in order to fit. I chose the mini-ITX form factor because I think mid & full tower cases are way too big. Smaller form factor brought with it a few compromises, it meant having only 2 RAM slots instead of 4, and less headers for cpu fans (Not a big deal). Just keep in mind, if you go with a smaller case, you will need to pay attention to your graphics card size. Some may not fit.
Intel vs AMD – Selecting the processor for me came down to the cost/performance. Both are good, but between the Intel i7-8700K and AMD Ryzen 2700X, I chose Ryzen because it had 2 more cores, it came with a really nice CPU fan, and was less expensive. If you go with an AMD CPU, you will need an AMD compatible motherboard. The same goes for Intel CPU’s.
Special RAM – As it turns out, not all RAM is compatible with Ryzen motherboards. For a complete list of compatible RAM, its recommended that you visit the website of the motherboard manufacturer. If you decide to go with TridentZ, look for a part number that ends with GTZRX.
Thermal Paste – The AMD Wraith Prism Cooler came with thermal paste pre-applied. I bought some because I didn’t know; could have saved $7.
InWin A1 RGB cable – When it came time to plug in the cable from the under-case LED strip to the header on the motherboard, it wasn’t long enough. I had to buy an $8 RGB extension cable to overcome this issue.
Case Fan/Water Pump Headers – I had four mounting locations for case fans on the InWin A1 case, but there were only two case fan headers available after I had the CPU fan and under-case LED strip connected to the motherboard. To get around this problem I purchased a Y-Cable splitter. Reading through the manual I found that the water pump headers were rated for a maximum of 2A (24W) each, which was enough to power my fans.
Case Fan Mounting – When mounting your case fans, you need to know the direction of the airflow. It wouldn’t be a problem if this information was labeled on the fan, or you could plug it in quickly to find out. Unfortunately you can’t. It took a youtube video for me to find out, but i will save you a little time – the label side of the fan (with the sticker) is the exhaust side.
Hard Drives – If you’re planning on installing more than one hard drive, it’s not a bad idea to get two different sizes (for example, 1Tb & 500Gb). For some reason I got two 500Gb (same brand and everything). When it came time to install Windows, I didn’t know which drive was which, and installed it on the wrong one. If you do end up buying two of the same, connect one and install windows before connecting the second one.
Compatibility – If you’re not 100% sure if the graphics card you are interested in will fit your case, or you have other compatibility doubts, you can use pcpartpicker.com as a resource.
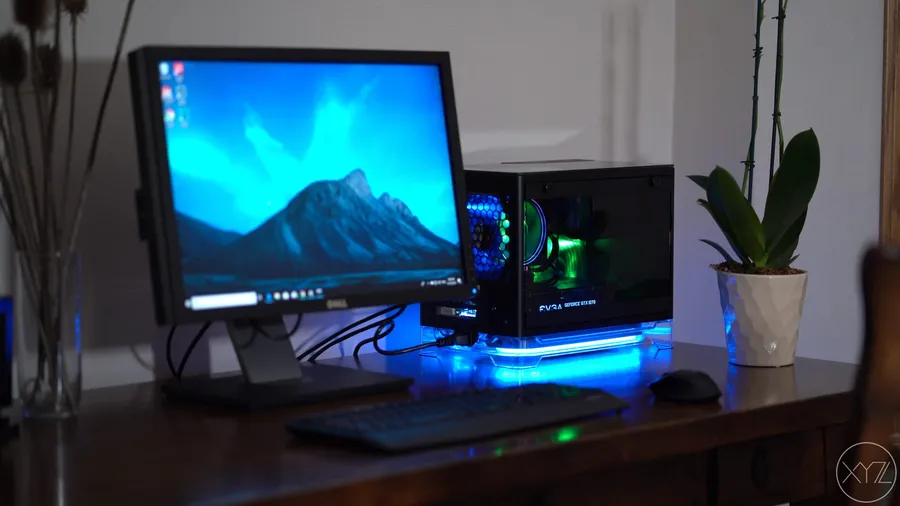
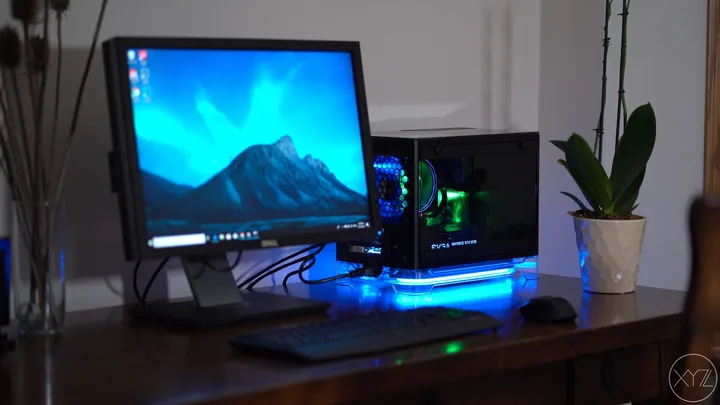
In the End… I was pretty happy with the outcome.
VIDEO
Note:Some of the links provided on this blog may be affiliated links, which help pay for this blog. At no additional cost to the buyer, If a purchase is made via an affiliated link, I earn a commission.